This article applies to everyone
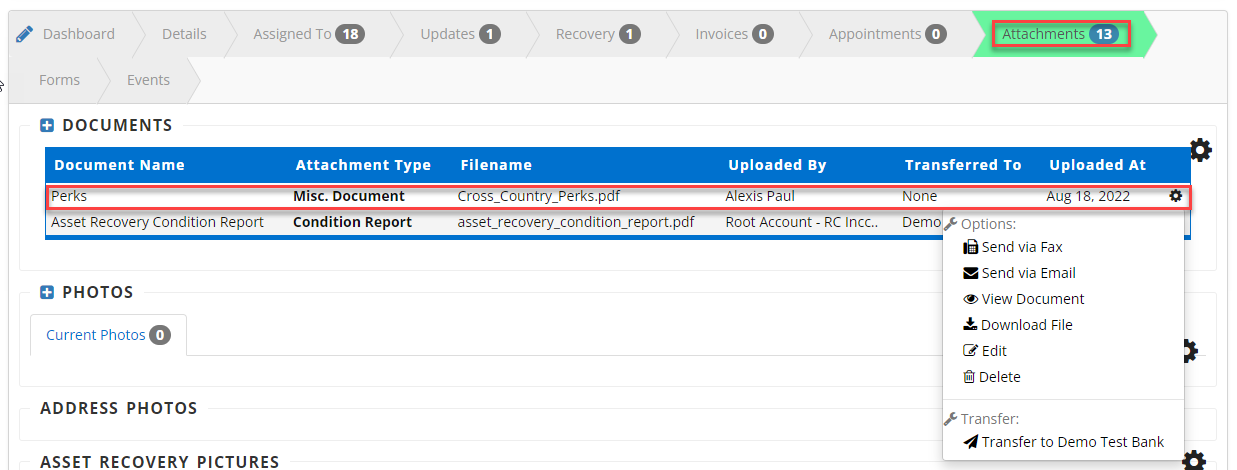
The attachments tab is where all the attachments for a case can be found. Attachments here can be attached during case creation, adding an address, during recovery of assets, and more.
How To Upload A Document
Step 1: From the case, view click on the Attachments tab
Step 2: Click the +Documents button

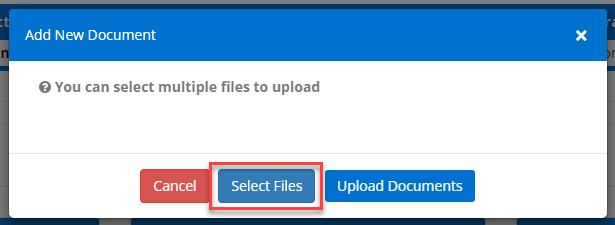
Step 3: Click Select Files on the pop-up

Step 4: When your files have been chosen fill out the next pop-up and click Upload Document
Note: For users doing repossessions in Illinois you will use Personal Property as the attachment type for your Privacy Removal Certificate.

Your document will then be attached to this case and by clicking the Gear you have the option for the following actions:
Send via Fax
Send via Email
View Document
Edit
Delete
Transfer to the lender or forwarder

How To Add Photos
Step 1: From the case, view click on the Attachments tab
Step 2: Click the +Photos button

Step 3: Click Select Photos from the pop-up

Step 4: Once photos are selected fill out the pop-up then click Upload Photos

You are now able to see your photo attached and by clicking the Gear you are able to transfer photos back to the service provider or forwarder


