This article applies to field agent and field agent supervisors who access RCMHow to Complete a Geo-Update for Pro or Basic Subscriptions
Note: The Windows app will record the IP address location when clicking the Geo-Update button
There are two ways to complete a GPS Update in RCM:
- From the map screen (available to Pro only)
- My Addresses > Update tab in the case details

Using the Map > Quick Update (Pro)
Step 1: Log into RCM and navigate to the map
Step 2: Click on the icon for the case in the map to open the case details and select the Quick Update button

Step 3: Under Quick Updates click the Quick-Action: Geo-Update button

Step 4: Click Ok on the success pop-up

Using the Map > Additional Items [three dots]
Step 1: Log into RCM and navigate to the Map
Step 2: Click on the icon for the case on the map screen
Step 3: Click the 3 Dots for additional actions

Step 4: Click the Geo-Update button
 Step 5: Click Ok on the success pop-up

Using the Update Screen
Step 1: Log into RCM and select a case
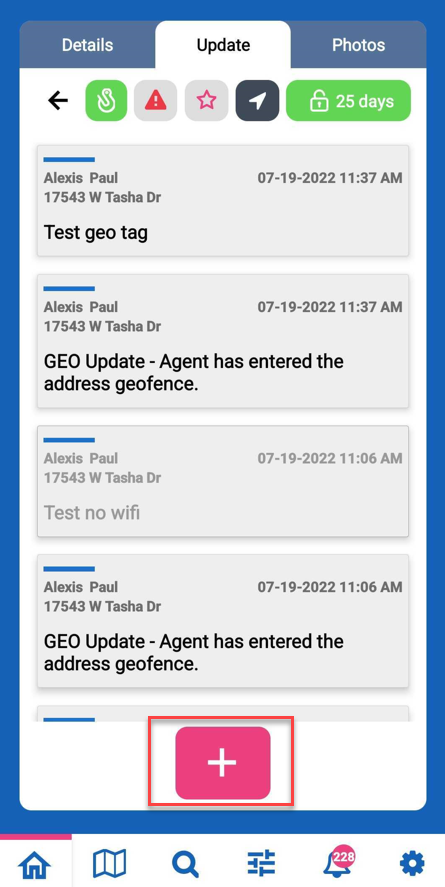
Step 2: Click the Update tab

Step 3: Click the + to add an update

Step 4: Click the Quick Action: Geo-Update button

Under the Update tab, you will see the Geo-Update that was made, along with how far (in miles) away from the address the update was made.
Want to change the blue Quick Updates? Click Here to learn how.
Need to pull a report of all your GPS Updates? Click Here to learn how.

