Smart Invoicing - Agency Contract Setup
Print
Modified on: Wed, 2 Apr, 2025 at 10:00 AM
This article applies to agency admins or accountant employee types
Smart Invoicing allows you to generate client invoices, saving time and ensuring you capture key billables. Smart Invoicing matches your contracts to the client and lienholders on the case and then listens to specific case events to auto-generate relevant fees to your case. The following article discusses how you can set up those contracts.
Contract Creation
Step 1: Hover over Settings and select Agency Smart Invoicing

Step 2: Click the +AddNew Contract button

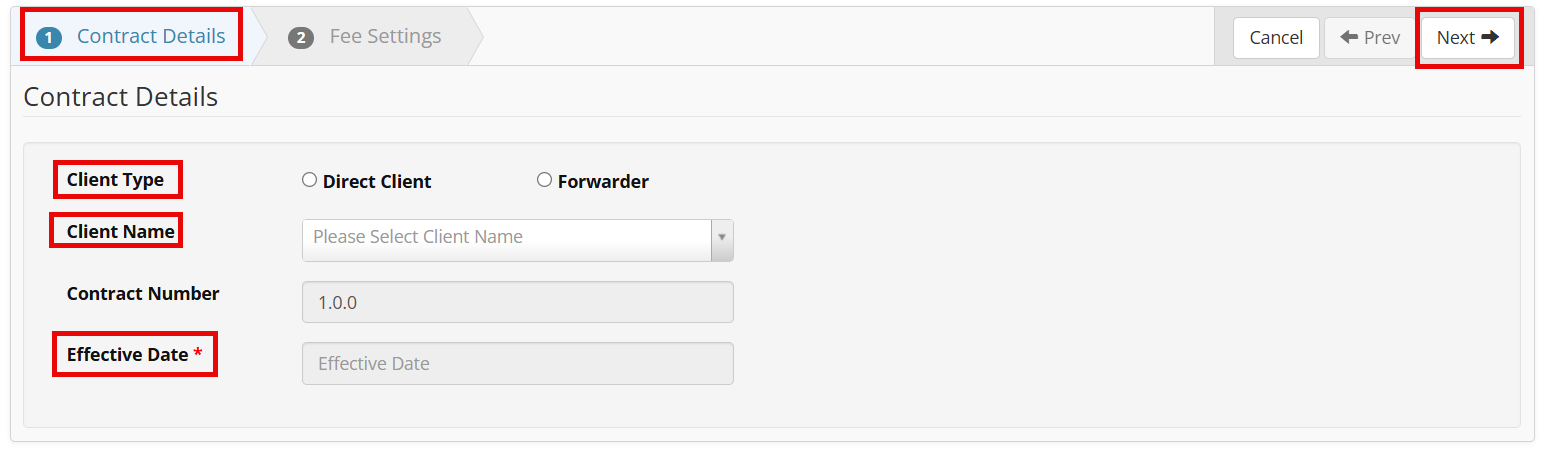
Step 3: Under the Contract Details tab, complete the following:
Client Type - Choose from Direct or Forwarder
Direct Client - Can only assign one client per contract
Forwarder - Can have multiple lienholders
Client Name
Contract Number - This is generated automatically
Effective Date - When you want this contract to be active
Note: Once an effective date is met, your contract will be live! Please be sure your contract is ready before this date or extend your effective date as needed. If your contract becomes active and you need changes, you can always edit the contract.
Step 4: Click Next
Step 5: Create Fee Settings
Recovery Fees
Fee Name - Select a case type
Master Fee - Connect selected case type to this fee
Coverage Area - Select an area for which the fee will be specific to
Amount - Dollar amount for the fee - you can do tier pricing by using a comma after each amount
Start Date - When the fee will start being active
End Date - When the fee will no longer be active
Notes - Any added information that you want to include
Action - Delete the line item

Misc Fees
Fee Name - Open text
Master Fee - Fee list based on your current Service Items
Amount - Dollar amount for the fee
Start Date - When the fee will start being active
End Date - When the fee will no longer be active
Notes - Any added information that you want to include
Action - Delete the line item
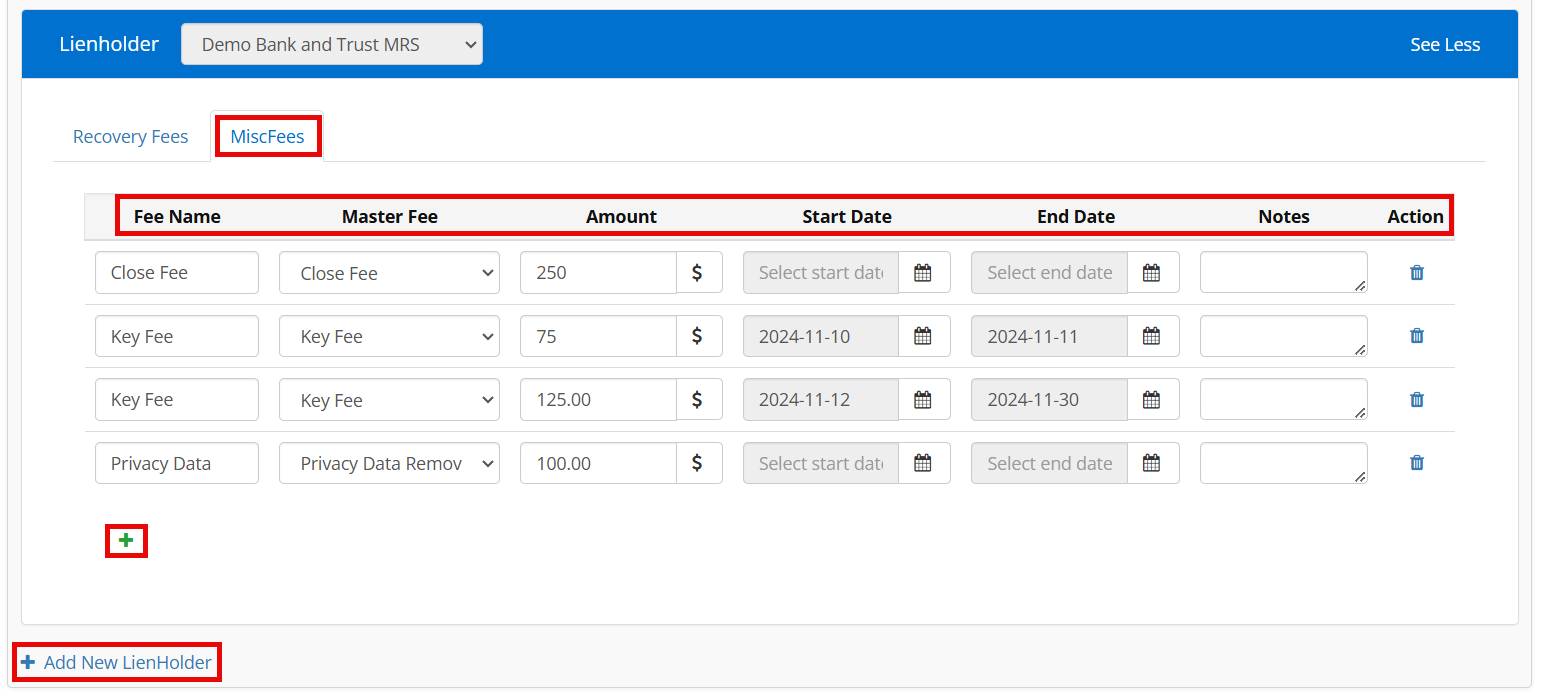
Step 6: Click the green + to add more fees
Step 7: Click + Add New Lienholder to add more clients to the same contract
Step 8: Click Save
Contract Maintenance
Once you have created your contract, you can maintain it with the actions listed on the right of your contract.
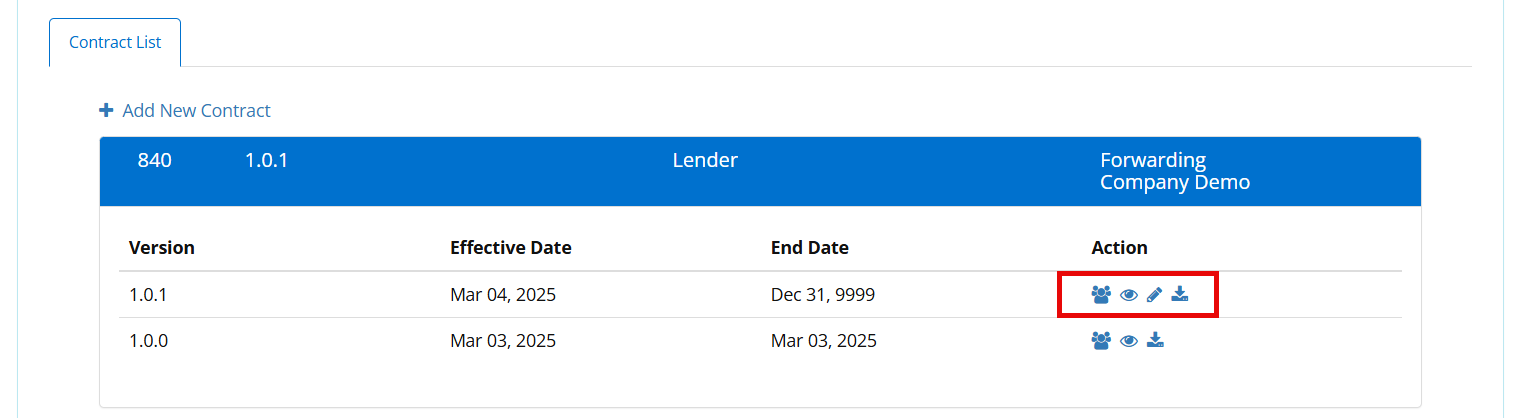
People icon - This will show you which lienholders are associated with that contract.
Eye icon - View only access to see contracted fees.
Pencil icon - Will allow you to edit/update your contracted fees.
Download icon - Allows you to extract the contract as an Excel.
How to Edit a Contract
Step 1: Click the Pencil icon

Step 2: Select the new Effective Date
Note: The contract version updates automatically when there is an edit.
Step 3: Click Next
Note: If you select the same day, the system will update invoices that meet that criteria immediately.

Step 4: Make changes and click Save
Did you find it helpful?
Yes
No
Send feedback Sorry we couldn't be helpful. Help us improve this article with your feedback.